Understanding Viruses
In today’s digital age, cybersecurity is not a luxury but a necessity. Windows 10, being one of the most popular operating systems in the world, is often targeted by cybercriminals who use viruses, malware, and other malicious software to compromise systems. This comprehensive guide aims to provide you with step-by-step instructions on how to remove a virus from Windows 10. From identifying the signs of infection to utilizing antivirus software and manual removal methods, this article has got you covered.
What is a Virus?
A computer virus is a type of malicious software that, once it infects a computer, can replicate itself and spread to other systems or files. In more advanced cases, viruses can perform harmful actions like deleting files, accessing personal data, or even controlling your computer remotely. Knowing how to remove a virus from Windows 10 starts with understanding what you’re up against.
Signs of a Virus Infection
Before diving into the removal process, it’s important to identify whether your system is indeed infected. Common signs include:
- Sluggish Performance: A sudden drop in system speed.
- Unexpected Pop-Ups: Frequent and annoying ads or messages.
- Unwanted Software Installation: Unfamiliar applications appearing on your desktop.
- File Deletion or Corruption: Missing or altered files.
- Unauthorized Access: Emails or messages sent from your account without your knowledge.
Types of Viruses
Understanding the type of virus you’re dealing with can help tailor your removal approach. Common types include:
- Trojan Horses: Disguised as legitimate software but damage your system once installed.
- Worms: Self-replicating viruses that spread through networks.
- Ransomware: Encrypts your files and demands a ransom for their release.
- Adware: Shows unwanted advertisements and can redirect your browser to suspicious sites.
Importance of Timely Virus Removal
Delaying virus removal can lead to dire consequences:
- Data Loss: Important files could be permanently deleted.
- Identity Theft: Personal and financial information could be compromised.
- System Damage: Prolonged infection may lead to irreparable system damage.
- Spread of Infection: The virus could spread to other systems, affecting friends, family, or coworkers.
By the end of this guide, you will have a clear understanding of how to remove a virus from Windows 10 efficiently and effectively. Let’s begin.
Preparatory Steps for Virus Removal
Backup Important Data
Before taking any action, it’s crucial to back up your important files to an external storage device or cloud storage. This ensures that even if something goes wrong during the virus removal process, your data remains secure.
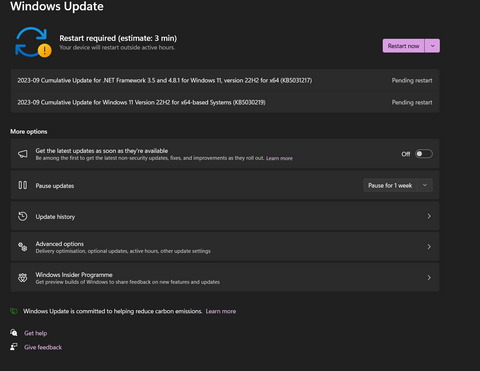
Update Windows 10
One of the first steps in learning how to remove a virus from Windows 10 is to ensure that your operating system is up-to-date. Microsoft frequently releases security patches that can fix vulnerabilities, making it harder for viruses to infect your computer.
- Go to Settings > Update & Security > Windows Update.
- Click Check for updates and install any available updates.
Boot into Safe Mode
Safe Mode is an essential tool when it comes to virus removal. Running Windows 10 in Safe Mode allows you to isolate the problem because only the essential drivers and programs are loaded, limiting the functionality of most viruses.
- Go to Settings > Update & Security > Recovery.
- Under Advanced startup, click Restart now.
- After your PC restarts, on the Choose an option screen, go to Troubleshoot > Advanced options > Startup Settings > Restart.
- Upon restart, select 4) Enable Safe Mode.
Disable System Restore
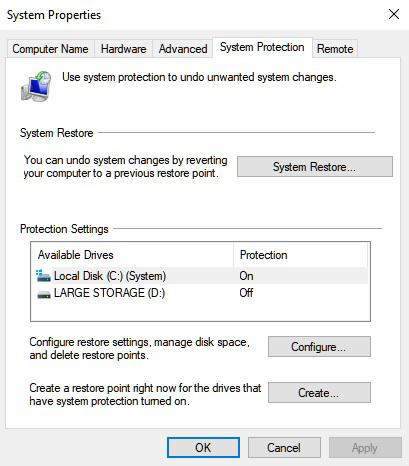
System Restore can inadvertently restore the virus back onto your computer. It’s advisable to turn it off temporarily.
- Type “Create a restore point” into the Windows search bar and click on the result.
- Under the System Protection tab, click Configure.
- Select Disable system protection, then click OK.
Download and Update Antivirus Software
While Windows Defender is a decent built-in solution, sometimes a specialized antivirus software is needed for complete removal.
Download a reputable antivirus software.
- There are a number of free anti virus available such as Avast, AVG
- Alternativly You can opt for a premium security such as Norton or our personal preference Bitdefender.
- Install and update the software to ensure it has the latest virus definitions.
Task Manager Overview
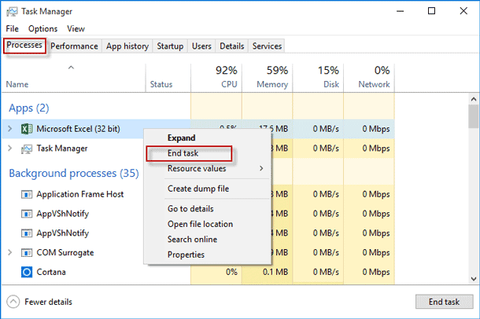
Before running a scan, open the Task Manager to end any suspicious processes.
- Press Ctrl + Shift + Esc to open the Task Manager.
- Navigate to the Processes tab.
- Look for unfamiliar or suspicious processes, right-click them and select End Task.
You are now prepared for the virus removal process. The next steps will guide you on how to remove a virus from Windows 10 using various methods.
Steps for Virus Removal
Now that you have taken the preparatory steps, you’re equipped to tackle the virus head-on. Here’s how to remove a virus from Windows 10 using different approaches.
Running a Full System Scan with Windows Defender
Windows Defender is the built-in antivirus tool for Windows 10 and offers a basic level of protection. Here’s how to use it:
- Go to Settings > Update & Security > Windows Security.
- Click on Virus & threat protection.
- Under Current threats, select Quick scan or Full scan based on your need.
Wait for the scan to complete, then follow the on-screen instructions to remove or quarantine the detected threats.
Using Third-Party Antivirus Software

If you have downloaded third-party antivirus software mentioned in the previous step, open it and run a full system scan. Different software has different interfaces, but the process is generally similar:
- Open the antivirus program.
- Locate the Scan or Full Scan option.
- Start the scan and wait for it to complete.
- Follow the prompts to remove or quarantine detected viruses.
Manual Virus Removal
In some cases, antivirus software may not be sufficient. In such scenarios, manual removal may be required.
- Identify Suspicious Programs: Go to Control Panel > Programs > Programs and Features and look for unfamiliar programs. Uninstall them.
- Registry Editing: Press Win + R and type regedit to open the Windows Registry. Be very cautious; incorrect changes can harm your system. Look for suspicious entries and delete them.
Additional Scans (Highly Recommended)
- Malwarebytes: This is a popular tool for removing malware and is highly recommended for a secondary scan.
- AdwCleaner: This tool specializes in removing adware, and it’s a good idea to run this scan for a thorough clean-up.
System File Checker (SFC)
Sometimes viruses corrupt system files, which can affect your system’s functionality even after the virus is removed. Run an SFC scan to repair these files.
- Open Command Prompt as an administrator.
- Type
sfc /scannowand press Enter.
Reset or Reinstall Windows
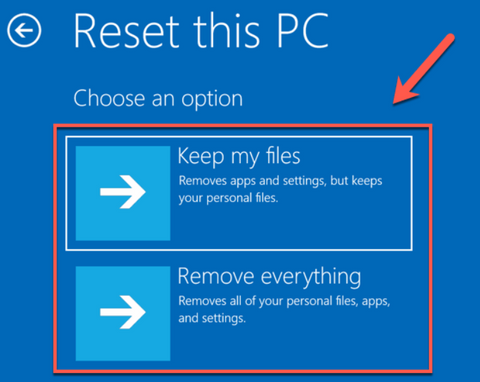
As a last resort, you may need to reset or reinstall Windows 10. This will remove all files, so make sure you’ve backed up your important data.
- Go to Settings > Update & Security > Recovery.
- Under Reset this PC, click Get started and follow the prompts.
Congratulations, you should now know how to remove a virus from Windows 10 effectively. But your job isn’t done yet, maintaining your PC to prevent future infections is just as crucial.
Take a look at our article on performing a windows clean boot for more detailed instructions
Post-Removal Steps and Preventive Measures
Verify the Removal
The first thing you should do after the removal process is to make sure the virus is gone. Repeat the system scan with both Windows Defender and your third-party antivirus software to confirm.
Enable System Restore Again
After ensuring the virus has been removed:
- Type “Create a restore point” into the Windows search bar and click on the result.
- Under the System Protection tab, click Configure.
- Select Turn on system protection, set the disk space usage, and click OK.
Update All Software
Viruses often exploit vulnerabilities in outdated software. Make sure all your applications, not just your operating system, are up to date.
Create a New Restore Point
Now that your system is clean, it’s a good time to create a new restore point.
- Type “Create a restore point” into the Windows search bar and click on the result.
- Under the System Protection tab, click Create.
- Name the restore point and follow the prompts.

Use Firewall
Ensure that your Windows Firewall is turned on and configured to keep out malicious software.
- Go to Control Panel > System and Security > Windows Defender Firewall.
- Check that the Firewall is active; if not, click Turn Windows Defender Firewall on or off to enable it.
- I you have opted for a third party security suite like Norton a software firewall will likely be included.
Regular Scans and Updates
Consistently running system scans and updating your antivirus software are essential preventive measures. Most antivirus software allows you to schedule regular scans.
Be Cautious Online
- Avoid Suspicious Emails: Don’t open attachments or click on links from unknown sources.
- Download Wisely: Only download software from trusted sources.
- Secure Browsing: Use browser security plugins and enable pop-up blockers.
Educate Others
One of the best ways to prevent future infections is to educate those around you about the importance of cybersecurity. Share resources, guides, and tips on how to remove a virus from Windows 10, and how to avoid them in the first place.
Summary
Removing a virus from Windows 10 can be a complicated task, but with the right tools and steps, you can successfully cleanse your system. More importantly, adopting good cybersecurity habits can prevent future infections, keeping your data safe and secure. Remember, the best cure is prevention. Stay vigilant, stay updated, and stay safe online.
And there you have it an in-depth guide on how to remove a virus from Windows 10, from identifying the issue to resolving it and preventing future infections. Thank you for reading, and may your computing always be secure. If you have any questions or require further details, feel free to ask in the comments.