In today’s fast-paced digital era, users frequently come across new software or applications that they want to test or explore. However, concerns about system security or potential conflicts with existing software can be deterrents. Enter Windows Sandbox: Microsoft’s answer to these concerns, ensuring a safe, isolated environment for software testing and exploration.
Whether you’re a developer, a security enthusiast, or just a curious user, Windows Sandbox offers a unique, risk-free environment to test, analyse, and explore.
What is Windows Sandbox?
Windows Sandbox is a feature introduced in Windows 10 (version 1903) that allows users to run applications in a secure, isolated environment. Essentially, it’s a lightweight virtual machine built into Windows, which uses the same OS image as the system you’re running, but functions as a separate instance.
Key Features
Temporary Session: Anything you do in the Sandbox is ephemeral. Once you close the session, all software, associated files, and other data within the Sandbox are permanently deleted.
Safe and Isolated: Sandbox runs in a separate instance, ensuring that any potential malware or unstable software does not affect your primary OS.
Integrated with Windows: No need for third-party virtual machine tools or settings adjustments. Windows Sandbox operates seamlessly with the Windows OS.
Efficient Performance: Leveraging hardware-based virtualization, Sandbox ensures a responsive user experience, mirroring the performance levels of native applications.
How Does It Work?
Windows Sandbox uses the Microsoft Hypervisor platform to create a separate OS instance. This instance is essentially a mirror of the user’s current OS but does not have access to the primary files or settings. The OS image for Sandbox is fetched from the user’s existing Windows installation, ensuring it’s always up-to-date and free from large downloads or setup hassles.
Use Cases
Software Testing: Test new applications without worrying about system instability or conflicts.
Malware Analysis: Analyse potentially harmful files or URLs in an environment where they can’t cause damage.
Browser Session Isolation: Conduct potentially insecure browsing activities without the risk of compromising your primary OS or data.
Limitations
While Windows Sandbox is a robust tool, it’s essential to be aware of its limitations:
- It doesn’t support high-end graphics or applications requiring advanced GPU capabilities.
- Some enterprise configurations might conflict with Sandbox, such as enforced network policies.
Enabling Windows Sandbox: A Step-by-Step Guide
Prerequisites
Before we dive into the enabling process, ensure you meet the following requirements:
Windows Version: You must be running Windows 10 Pro, Enterprise, or Education (version 1903 or later).
Importand Note: If you do not meet the above you will have no option for sandbox in windows features
Virtualisation: Ensure that virtualization capabilities are enabled in your computer’s BIOS/UEFI settings.
System Requirements: At least 4GB of RAM (8GB recommended), 1GB of free disk space (preferably on an SSD), and a 2-core processor (4-core recommended).
Step-by-Step Guide
Verify Virtualisation is Enabled:
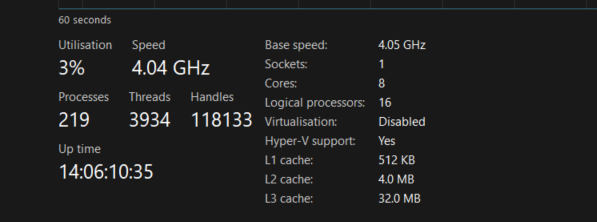
- Right-click on the Windows taskbar and open “Task Manager.”
- Click on the “Performance” tab.
- Under the “CPU” section, look for “Virtualisation.” If it reads “Enabled,” you’re good to go. If this is set to disabled like the image below, you might need to enter your computer’s BIOS/UEFI settings to enable it.
Enable Windows Sandbox Feature:
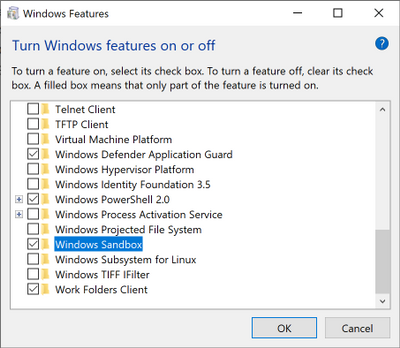
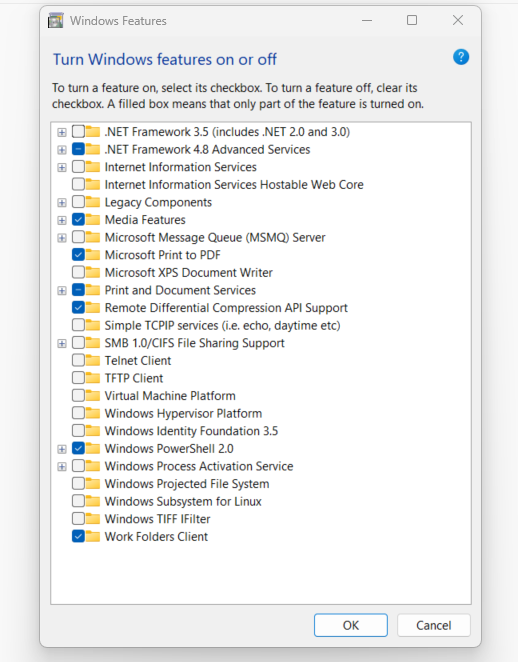
- Press Windows + R to open the Run dialog box. Type optionalfeatures and hit Enter.
- In the “Windows Features” window that opens, scroll down and look for “Windows Sandbox.”
- Check the box next to “Windows Sandbox.”
- Click on the “OK” button.
- Wait for the feature to be installed. This process may take a few minutes.
- Once the installation is complete, restart your computer when prompted.
Launching Windows Sandbox:
- After the reboot, click on the Windows Start menu and type “Windows Sandbox.” You should see the application appear in the search results.
- Click on “Windows Sandbox” to launch it. If prompted by a User Account Control (UAC) dialog, click “Yes” to proceed.
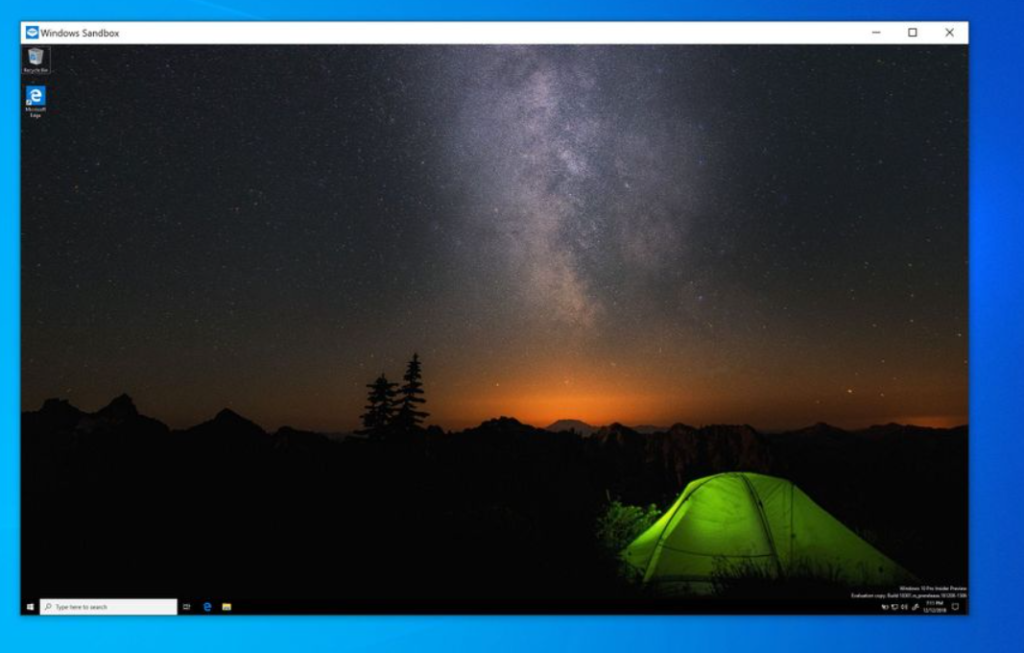
- A new window will open, representing a fresh instance of Windows, isolated from your main environment.
Using Windows Sandbox:
- You can now drag and drop files or applications into the Sandbox environment to test them.
- Any changes you make or software you install in the Sandbox will be discarded once you close the Sandbox window.
Closing Windows Sandbox:
- Once you’re done with your session, simply close the Windows Sandbox application.
- Remember, all changes and data within the Sandbox will be lost when you close the application.
Safety Tips:
Always be cautious when testing potentially harmful files, even in the Sandbox. While it’s designed to be isolated, practicing good security habits is always beneficial.
Avoid logging into personal accounts or accessing sensitive information while in the Sandbox.
Conclusion
Windows Sandbox provides a secure environment for testing and exploration without affecting your primary OS. It’s an invaluable tool for professionals, enthusiasts, and everyday users who occasionally need a safe space to try out new things. By following this guide, you can easily enable and start using Windows Sandbox for a safer computing experience.