Upgrading or installing a new hard drive in your computer can be an empowering experience, offering you increased storage capacity or faster speeds. However, the process might seem daunting if you’re unfamiliar with computer hardware or technical jargon. This comprehensive guide aims to simplify the procedure, walking you through everything from essential terminology to the tools you’ll need and the steps for installation. Whether you’re working with a desktop or a laptop, this guide will equip you with the knowledge to successfully install a new hard drive, ensuring that your data remains safe and your system runs smoothly.
Table Of Contents
Hard Drive Terminology for Beginners
Part 2: Installing in Desktop Computers
Hard Drive Terminology for Beginners
Hard Drive (HDD): A device used to store data permanently, unlike the temporary storage offered by RAM.
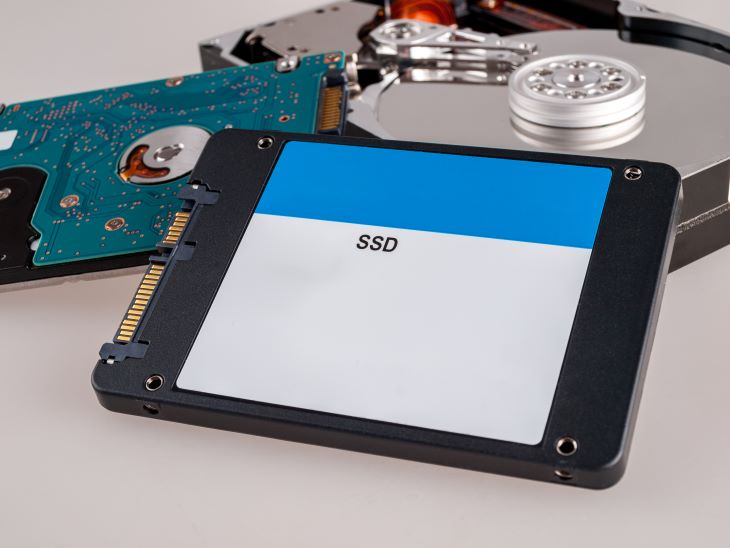
Solid State Drive (SSD): A faster, more durable, but often more expensive type of hard drive that also stores data permanently.
Partition: A section of a hard drive that acts as an independent disk.
File System: A system that controls how data is stored and retrieved on a hard drive. Examples include NTFS and FAT32 for Windows, and ext4 for Linux.
SATA: Stands for Serial ATA, a type of connection interface between the hard drive and the motherboard.
IDE: Older interface for connecting hard drives, now largely obsolete but sometimes found in older systems.
Cloning: The process of making an exact copy of a hard drive’s contents, including the operating system and all files.
Formatting: Preparing a hard drive for use by an operating system, which involves erasing all data on the drive.
Defragmentation: The process of rearranging files on a hard drive for optimal performance. Primarily applies to HDDs.
BIOS/UEFI: Basic Input/Output System or Unified Extensible Firmware Interface. These are firmware interfaces that initialize hardware during the booting process and provide runtime services for operating systems.
Boot Drive: The hard drive from which your computer starts up.
Master Boot Record (MBR): A special type of boot sector at the very beginning of a partitioned drive.
GUID Partition Table (GPT): A newer disk partitioning system that is part of the UEFI standard.
Disk Management: A utility in Windows that allows you to manage partitions and hard drives.
RAID: Stands for Redundant Array of Independent Disks. It’s a technology used for increasing storage reliability via redundancy.
You may also be interested in our article: The Basics of Computer Hardware: A Beginner’s Guide
Part 1: What You Will Need
Upgrading or installing a new hard drive can seem like a daunting task, especially if you don’t have a technical background. However, it’s a relatively straightforward process if you have the right guidance. Let’s start by discussing the essential tools and components you’ll need for the installation process.
A Compatible Hard Drive
Why You Need It: The first thing you will need is the hard drive itself. The type of hard drive you can install will depend on your computer. The two most common types are HDD (Hard Disk Drive) and SSD (Solid State Drive). SSDs are generally faster but more expensive. Check your computer’s specifications to know what type of drive and size is compatible.
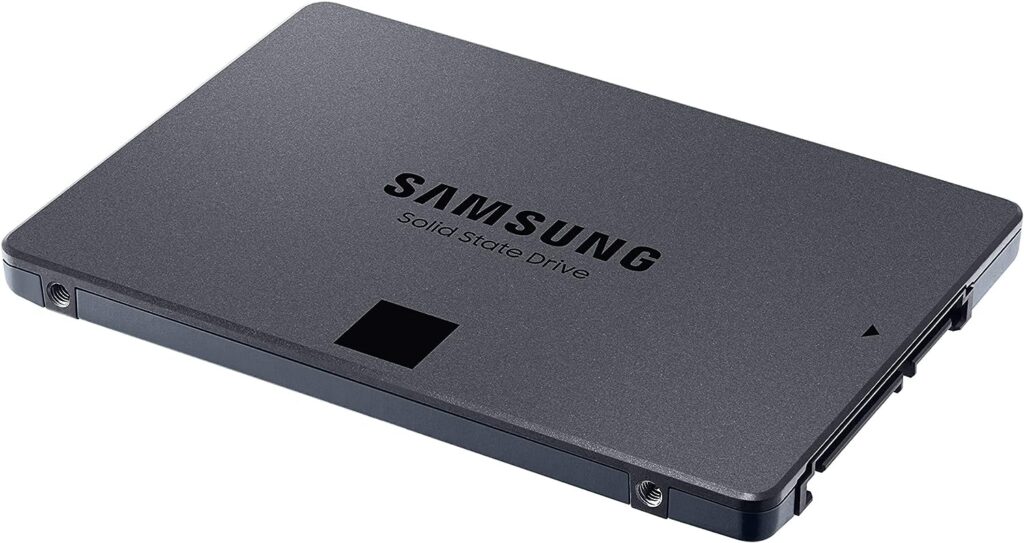
Our SSD recommendations:
If you are changing from a traditional HD we would highly recommend upgrading to an SSD
On a budget : Crucial BX500
Performance and storage: Samsung QVO (Available in 1TB to 8TB)
NVMe – Samsung 970 EVO Plus 2 TB PCIe NVMe M.2
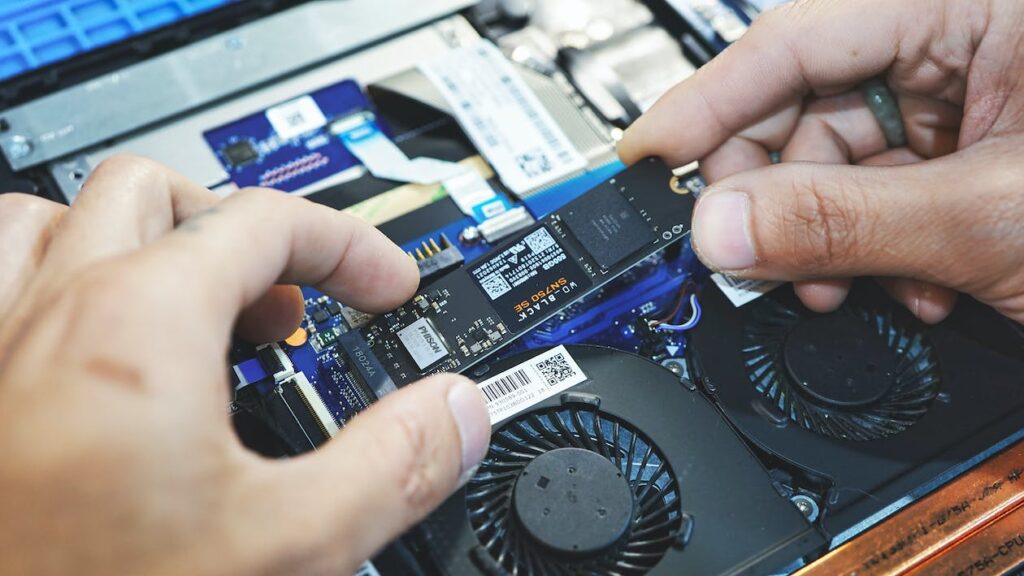
In addition to HDDs (Hard Disk Drives) and SSDs (Solid State Drives), there’s another type of storage device gaining popularity: NVMe (Non-Volatile Memory Express) drives. NVMe drives are a type of SSD but are faster and more efficient because they connect directly to the computer’s motherboard via an M.2 slot, instead of using a SATA connection. They’re especially useful for tasks that require rapid data access, such as video editing or gaming. However, not all motherboards have an M.2 slot, so be sure to check your computer’s specifications to see if you can take advantage of this faster technology.
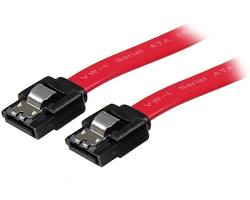
SATA Data Cable
This cable transfers data between the hard drive and the motherboard in most traditional HDDs and SSDS. One end of the SATA data cable plugs into the motherboard, and the other end plugs into the hard drive.
SATA Power Cable
This cable provides power to your hard drive. One end plugs into your power supply unit (PSU), and the other end plugs into the hard drive.
Why You Need SATA Cables:
Data Transfer: The SATA data cable is essential for facilitating the communication between the hard drive and the motherboard. Without it, the hard drive cannot read or write data.
Power: The SATA power cable is necessary for the hard drive to function. Without power, the hard drive won’t spin up, and you won’t be able to access or store data on it.
Screwdriver
Why You Need It: A Philips head screwdriver is typically needed to open your computer case and to secure the new hard drive. Make sure the screwdriver size matches the screws on your computer case.

ESD Wrist Strap
Why You Need It: An Electrostatic Discharge (ESD) wrist strap is used to prevent static electricity from damaging the sensitive components inside your computer.
Alternative Grounding Methods: If you don’t have an ESD wrist strap, you can still ground yourself by regularly touching a metal part of the computer case or another grounded metal object. This will help discharge any static electricity that may have built up. Some people also opt to work on an anti-static mat as an additional precaution.
Data and Power Cables
Why You Need It: Your new hard drive will need to be connected to your computer’s power supply and data ports. Most new hard drives come with these cables, but if not, you’ll need to purchase them separately. The cables you need will depend on the type of hard drive and your computer’s available ports. Common data cables are SATA for modern drives.
External Hard Drive or Cloud Storage (for Data Backup)
Why You Need It: Before installing the new hard drive, it’s crucial to back up your important data. This can be done using an external hard drive like the WD 2TB Elements or a cloud-based service like Google Drive or Dropbox.
Hard Drive Mounting Bracket
Why You Need It: Some computer cases require a mounting bracket to secure the hard drive. This is more common in laptops or some smaller desktops. Check your computer’s documentation to see if this applies to you.
Operating System Installation Media
Why You Need It: After installing a new hard drive, you will need to install an operating system (OS) like Windows, macOS, or Linux. You can create your own installation media using a USB drive or download it directly from the OS provider.
Internet Connection
Why You Need It: An internet connection is essential for downloading drivers, system updates, or even the operating system itself. Make sure you have reliable internet connectivity for the installation process.
User Manual or Installation Guide
Why You Need It: It’s always good to refer to your computer and hard drive’s user manual or installation guide for any specific requirements or instructions. While general guides like this one are helpful, there might be model-specific steps you’ll need to follow.
Now that we have gathered all the necessary components and tools, we can move on to the physical steps required to install your new hard drive, which will include removing your old drive if necessary.
Part 2: Install the New Hard Drive in Your Desktop Computer
Step 1: Prepare Your Workspace
- Turn Off Your Computer: Make sure to shut down your computer completely. Unplug all cables, including the power cord.
- Open Area: Find a clean, flat, and well-lit area to work. A table with plenty of space around is ideal.
- Ground Yourself: If you have an ESD wrist strap, now is the time to put it on to prevent any static damage to your computer components.
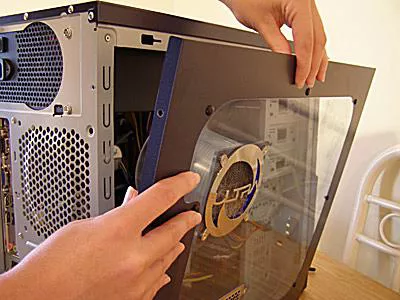
Step 2: Open the Computer Case
- Locate Screws: Most desktop computer cases have screws on the back that hold the side panel in place. Laptop users should consult their user manual for specific instructions.
- Use Screwdriver: Use your Philips screwdriver to remove these screws and set them aside in a safe place.
- Remove Side Panel: Gently slide off or swing open the side panel to expose the computer’s internals.
Step 3: Locate and Remove the Old Hard Drive (if applicable)
- Find the Hard Drive: Your current hard drive should be mounted in a drive bay. Follow the data and power cables if you have difficulty locating it.
- Disconnect Cables: Carefully disconnect the data and power cables connected to the old hard drive.
- Remove Screws: Use the screwdriver to remove the screws securing the hard drive to the drive bay.
- Slide Out the Drive: Once the screws are out, slide the hard drive out of its bay. If your hard drive is in a mounting bracket, you’ll need to remove that as well.
Step 4: Install the New Hard Drive
- Mounting Bracket: If your case requires a mounting bracket, attach it to your new hard drive first.
- Slide In the Drive: Place your new hard drive into an empty drive bay or where the old drive was located. Make sure the connectors are facing towards the computer’s power and data cables.
- Secure the Drive: Use the screws you removed earlier (or new screws if provided) to secure the new hard drive in place. Make sure it is tightly fitted.
- Connect Cables: Installing SATA Cables in Desktops
- Data Cable: Locate a free SATA port on your motherboard. Plug one end of the SATA data cable into this port and the other end into your new hard drive.
- Power Cable: Plug one end of the SATA power cable into a free plug from your power supply unit (usually labelled ‘SATA’) and the other end into your hard drive.
Step 5: Close the Computer Case
- Double-Check Connections: Before closing up, make sure all connections are secure, and no cables are blocking any fans.
- Replace the Side Panel: Place the side panel back onto the computer case.
- Screw it in Place: Use the screws you set aside earlier to secure the side panel back onto the computer case.
Step 6: Install the Operating System
- Plug in the Computer: Connect all the cables back, including the power cable, and turn on your computer.
- Enter BIOS: When your computer starts up, enter the BIOS by pressing the designated key (commonly “DEL,” “F2,” or “F10”). This will vary by manufacturer, so consult your user manual.
- Boot from Installation Media: Within the BIOS, set your installation media (USB drive, CD/DVD) as the primary boot device.
- Install the OS: Follow the on-screen instructions to install your operating system.
Step 7: Partitioning and Formatting the New Hard Drive
- After installing your operating system, the new hard drive might need to be partitioned and formatted, as not all new hard drives come pre-formatted.
- Partitioning involves dividing the hard drive into distinct sections that can be managed separately.
- Formatting prepares the partition to store files in a particular file system format like NTFS for Windows or HFS+ for macOS.
- Both tasks can usually be done using built-in disk management tools in Windows or Disk Utility on macOS.
Step 8: Final Checks and Updates
- Update Drivers: Once the OS and disk utilities are installed, make sure to download the latest drivers for your hard drive and computer components.
- Restore Backup: Use your external hard drive or cloud storage to restore your backed-up data onto your new hard drive.
Congratulations! You have successfully installed a new hard drive. Though it might seem overwhelming at first, with the right tools and steps, anyone can complete this upgrade. Always remember to refer to your specific user manuals for any model-specific guidance.
Part 3: Installing a New Hard Drive in a Laptop
Replacing or adding a hard drive in a laptop involves a different set of challenges compared to a desktop computer, primarily because space is at a premium and the configurations are less modular. Here’s how to go about it.
Step 1: Backup Your Data and Prepare Your Workspace
- Backup Important Files: As with a desktop, it’s critical to backup any important data before you start the installation process.
- Workspace: A clean, well-lit table is an ideal workspace. Make sure you have all your tools and components within reach.
Step 2: Turn Off and Unplug Your Laptop
- Shutdown: Completely turn off your laptop.
- Unplug All Cables: Remove the power cord and any other connected devices like a mouse or external hard drive.
- Remove the Battery: If your laptop’s battery is removable, take it out. This is an extra precaution to prevent any electrical damage.
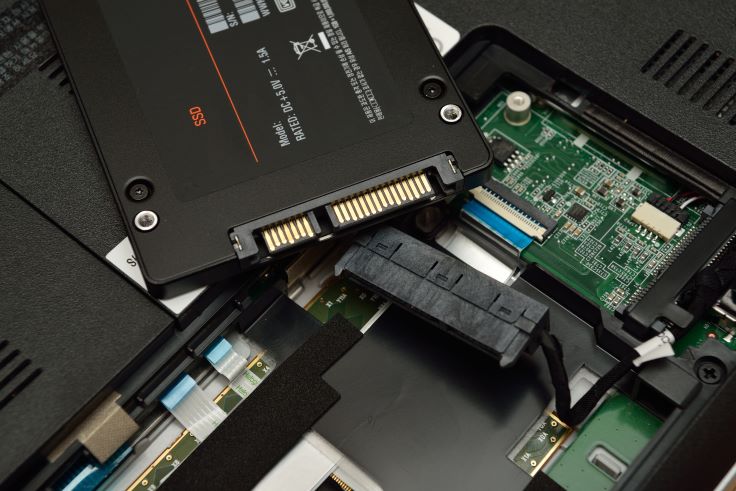
Step 3: Open the Laptop’s Hard Drive Compartment
- Locate the Compartment: On most laptops, the hard drive compartment is located on the bottom and is marked by a small hard drive symbol.
- Use Screwdriver: Use your Philips screwdriver to remove the screws securing the hard drive compartment cover.
- Remove Cover: Gently lift off the cover and set it aside.
Step 4: Remove the Old Hard Drive (if applicable)
- Note Orientation: Before removing, observe how the old hard drive is oriented in its bay.
- Disconnect Cables: Usually, the hard drive is connected to the laptop by a connector that will unplug as you slide the drive out.
- Loosen Screws: There may be screws or a retention clip holding the drive in place. Use your screwdriver to remove or loosen these.
- Slide Out: Gently slide out the old hard drive. Some laptops use a hard drive caddy which you’ll transfer to the new drive.
Step 5: Install the New Hard Drive
- Caddy Attachment: If your old drive was in a caddy or had adapter connectors, transfer these to your new hard drive.
- Slide In: Slide the new drive into the bay, making sure it’s securely connected.
- Secure Drive: Replace any screws or retention clips you removed earlier to secure the hard drive in its bay.
- Reattach Cover: Place the hard drive compartment cover back on and screw it into place.
In most laptops, you won’t have to worry about separate SATA cables. The hard drive or SSD will slide into a bay that has integrated power and data connectors. However, if your laptop does require separate connections, they are usually provided as part of the laptop’s hard drive caddy or are attached to the inside of the hard drive bay for most laptop users, separate SATA data and power cables are generally not required.
Step 6: Reinsert the Battery and Turn on the Laptop
- Reinsert Battery: If you removed the battery earlier, now’s the time to put it back.
- Plug in Laptop: Connect the power cord and any other necessary cables.
- Power On: Turn on the laptop.
Step 7: Install the Operating System and Restore Data
- BIOS Access: Similar to a desktop, access your laptop’s BIOS to make your installation media (usually a USB drive) the primary boot device.
- OS Installation: Follow on-screen instructions to install your chosen operating system.
- Restore Data: After successfully installing the operating system, restore your backed-up data onto the new drive.
Step 8: Partitioning and Formatting the New Hard Drive
Just like with desktop computers, your new hard drive may require partitioning and formatting. This is because not all new hard drives come pre-formatted for your operating system.
Partitioning will allow you to create distinct storage sections on your hard drive, while formatting will prepare these partitions to hold files in a format that your operating system can read.
You can perform these tasks through the built-in disk management tools on Windows or Disk Utility on macOS.
Step 9: Final Checks and Driver Updates
- Update Drivers: Ensure that all your laptop’s drivers are updated to the latest versions.
- Test: Give your laptop a thorough test to ensure everything is working as it should.
There you have it! You’ve successfully replaced or added a new hard drive to your laptop. Given the more confined working space of laptops, some of these steps may be a bit more challenging compared to a desktop, but with careful attention and patience, it’s an attainable goal for even a tech beginner.
Remember, as always, to consult your laptop’s specific user manual for any model-specific instructions or nuances.